Tag Archives: valentines day

Valentines Day: Etsy Card Finds

One of my favorite Valentines Day past times comes from when I was just a wee one. Back when kids were nice to each other and before they had time to form prejudices and unjust anger towards each other. I loved going to the store and picking out the pack of Valentines Day cards I’d be handing out to my classmates. Robots with hearts, Scooby Doo or maybe Bugs Bunny.
Now that I’m grown there’s only a few people that get cards from me, so I like to make sure they’re extra special. As always my favorite place to find these special cards is Etsy.

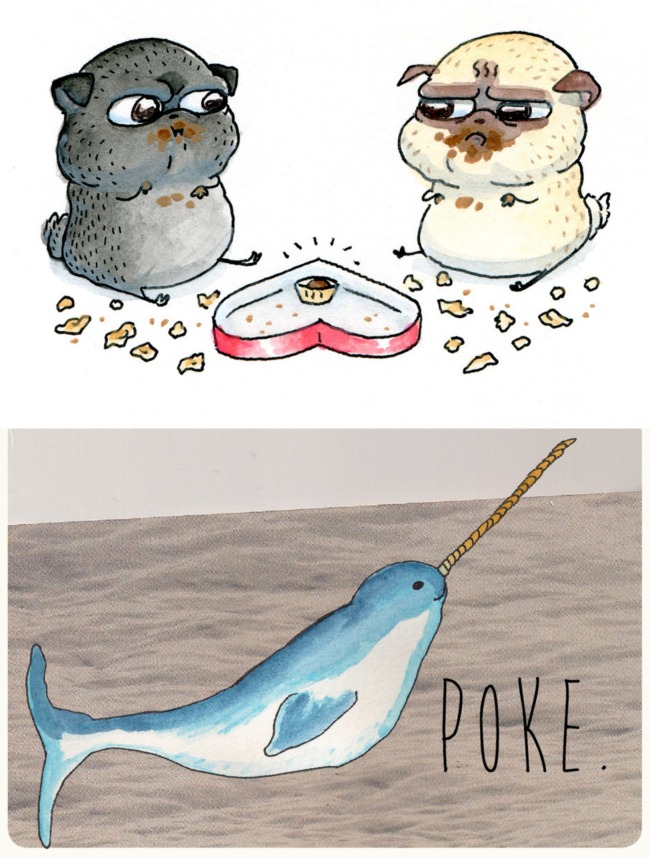
Image:: Box of Chocolate Pugs Card :: Narwhal Poke Card :

Image

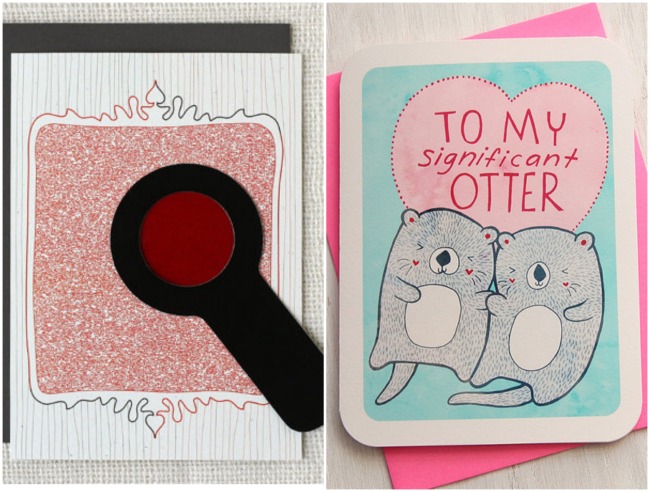
: Valentine Decoder Card :: Otter Love Card :

Image
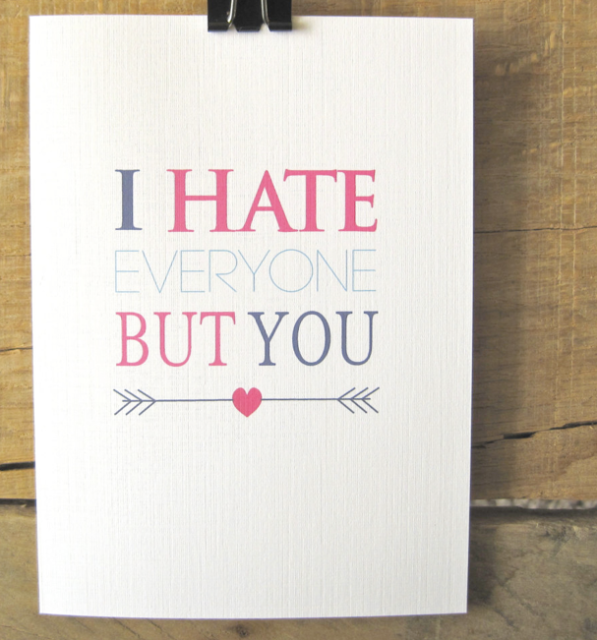
My personal favorite, I Hate Everyone But You card. It says oh so much with just a few little words.

You have a little more than one week to make sure you find that special someone(s) something great for Valentines Day. Buying handmade and local is a great way to support those artists that work hard for their craft.

xo

smsignature

Leave a comment

Filed under art

V-Day

So..

Happy Valentines Day!

I didn’t have a well thought out post for today. I spent somewhere close to 8 hours at the hospital today, and at least 2 1/2 hours driving. All is well and my moms surgery went perfectly fine.

I hope everyone spent today loving themselves, and those around them.

xo

Leave a comment

Filed under life

3 Ways to a Healthy and Loving Valentines Day: Featured Post

Today I bring a special little treat to you all.. My very first featured blog post! Everybody has those moments of weakness where they just want to give in and binge on chocolate and sweets. With the Holidays (almost) a distant memory, our New Years resolutions starting to lose momentum, and heart shaped boxes filled with chocolates beckoning come hither at every turn in the grocery store, it’s the perfect time to get that friendly reminder on how to eat healthy and stay positive.

My featured blog post comes from my friend Kelley Walsh, a holistic health coach. Kelley has her Bachelors Degree in Exercise and Health Science, and received extensive training from the Institute for Integrative Nutrition. She has an intense passion and drive to share the joy of healthy living with the people around her.

Kelley’s goal is to help others create that perfect balance in their life, with a large dose of happiness to boot. She utilizes practical lifestyle coaching to help you create that “go to” guide that’s just right for you. You can find Kelley over at KelleyWalsh.com!

On to Kelley!


The romantic day of cupid and his arrows is right around the corner, love is in the air! Stores are stocked full of red and pink hearts, stuffed animals, amorous cards and of course CHOCOLATE! Valentines day is filled with sweet temptations and it can be challenging for those watching their weight.  However, February is the month of love so this is a great opportunity to remember to show the affection we have for oneself and the people around us!

Start your Valentine’s Day off with a healthy breakfast. Strawberries, the heart shaped, delicious fruit loaded with antioxidants, Vitamin C and fiber, can be well enjoyed with Greek yogurt and my Yogi Granola. Check back this coming Friday for the recipe!

Maybe even try some gentle yoga to start your day with mental clarity and vitality.

Instead of  giving the box of chocolates or the dozen donuts. What about a big fruit salad with your favorite fruits or a dozen oranges/tangerines to keep those winter colds and flus away! Check back this coming Friday for a guide on the best fruits and vegetables to pick at your local grocery store. Complete with an even better recipe!

Plan a romantic dinner with your valentine and cook up a well-balanced healthy meal that won’t leave you feeling full. You can enjoy the rest of the night together bloat-free. Check out my Recipes at Kelleywalsh.com for ideas. Treat yourself to a sweet after dinner with my gluten free Chocolate Macaroons. What better way to finish off your meal then with an aphrodisiac like chocolate!

————————————————————–

Thanks for reading everybody. Be sure check back this coming Friday for another great post from Kelley. And of course check out her website kelleywalsh.com for some great recipes and health coaching!

xo

3 Comments

Filed under life

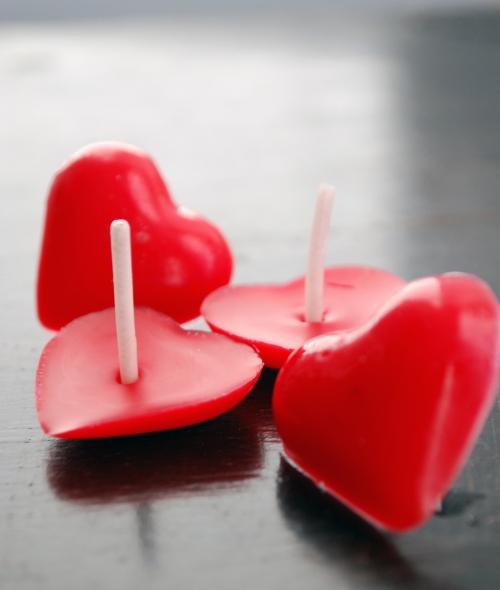
DIY Heart Shaped Mini Candles

I’ve come to the conclusion after my week long Valentines Day DIY’s, that this one is my favorite. Yesterday’s was a close second, but this one takes the cake. Even if it was just a little bit messy.

If you missed my other DIY’s this week, here’s a little recap for you.

Last Saturday I had handmade Valentines Day cards.
Monday I posted some great Vday inspired nail art.
TuesdayDIY sculpey heart bracelet.
Wednesday Framed paint sample artwork – Hearts!
Thursday – some really yummy Valentines Day recipes and food ideas
FridaySweets for Fido, homemade dog treats
SaturdayDIY felt heart on a stick

It’s been a really great run this week, and I’m feeling more inspired than ever. I’ll be going back to my DIY Saturday posts next weekend, and already have some great projects and ideas coming your way. So be on the look out!

Now, on to today’s DIY! Mini heart shaped candles!

Supplies:

  • Heart shape molds (I used small heart shaped chocolate making molds)
  • Double boiler (pictures below, I used a boiling pot of water and a small glass dish)
  • Wick
  • Red beeswax
  • Scissors
  • A spoon you don’t mind getting covered in wax

Directions:

1. First things first. You’re going to need to bring the water to a boil, with the small glass dish in the middle of it. While it’s starting to reach boiling, cut up pieces of the red beeswax (or use regular beeswax and dye it. I found a roll of red beeswax at my local craft store) and put it in the glass dish.

2. Once the water starts to boil, but the lid ontop of the pot and wait close to 5 minutes, or until the beeswax is melted. Keep an eye on it!

3. While waiting for the wax to melt, take your wick and cut off small pieces of it. I made my wicks a little bit longer so I could cut them down if need be.

4. By now the beeswax should be all melted. Turn off the heat. To make the next part a little easy I dumped out a lot of the water in the pot. Be very careful not to dump out any of the melted wax, nor get any water in the wax itself!

5. You’re going to have to work quickly at this part. Using your spoon, fill up the molds. My molds were small enough it only took 1 1/2 spoonfuls for each, but I still had to work quick enough not to let the wax start to solidify in the molds.

6. Taking your wicks, stick them into the middle of the hearts, or even angled upwards coming out of the top. I pushed the wicks into the bottom far enough that they warmed up just enough to stay put without any help while it cooled.

Place them in a safe place to cool down and now you’ve got some adorable miniature candles.

A few words on cleanup. I found re-boiling the water with the glass dish inside helped to break up all the dried on wax. Even on the spoon, I put it in the glass dish to boil as well. Once all the wax is melted and mixing in with the water, pour it out. Any left over wax (which should be very little) wash it in hot water while the wax is still warm itself.

I can’t give away what my plan is for these little gems, but you could use them for cupcake toppers, cute accents for a romantic dinner, or even put them on top of a nicely wrapped present. I love possibilities!

xo

3 Comments

Filed under crafts, DIY

Breakfast in bed: eggs in the heart shaped basket

If you happen to have been around the past week, I recently made a Valentines Day inspired post on recipes and cute little food ideas you could do for your loved one. The post can be found here.

My favorite idea came in the form of a little heart cut out of a piece of bread, and an egg in it’s place. Egg in the heart shaped basket, how could you not adore that?

Well. Yesterday morning Kh surprised me with a mimosa, and this!

Kh turned the heart shaped cut out hearts into tiny grilled cheese, that when put together made one heart. Cute!

Monday  morning I’m heading out to New York and wont’ be back until Wednesday evening, maybe even Thursday. Which means, I’ll be missing Valentines Day. We’re both pretty bummed about it, but I have my own little tricks and surprises in store for when I’m away.

I’ll be posting all of that later, I can’t give away the good stuff!

xo

Leave a comment

Filed under food

DIY Felt Heart on a Stick

Today is the second to last day of my week of Valentines Day crafts. I’ve had an absolute blast making all of these, and I can’t wait until I do another week long stint of DIY’s. Between today and tomorrows DIY,  I really can’t choose which one is my favorite. I’ll let you decide for yourself.

Supplies:

  • 2 pieces of felt
  • A heart shaped stencil (you could draw your own)
  • Either a sewing machine or needle and thread
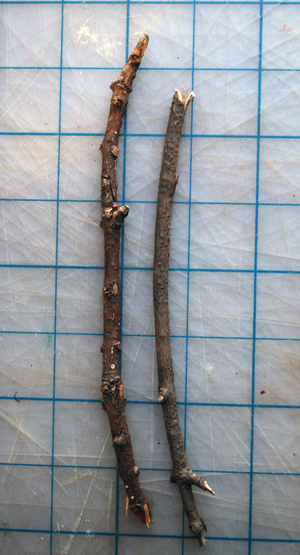
  • A stick (I found my sticks while taking the dogs on a walk, you could use wooden dowels)
  • Yarn
  • Felt glue/strong adhesive
  • Stuffing (I used tissue paper)

Directions:

1. Trace your heart stencil on each of the pieces of felt. Cut them out.

2. Making sure the sides with any marker/pen marks on them are facing outwards, place the two pieces of felt ontop of each other. Pin the two pieces of hearts together. I used 3 pins on mine.

3. Either using your sewing machine, or by hand sew the two pieces together leaving a big enough hole at the bottom to turn the hearts inside out and glue the sticks inside.

4. Make sure you knot the ends of the sewing thread. Once securely sewn together, turn it inside out.

5. Now stuff the heart! I used tissue paper as it was the only thing I had ample supply of. Be careful not to stuff the heart to full. This can misshape it.

6. Once you have the heart stuffed to your liking, take your adhesive and stick. Place a thin line of glue on one side of the stick and put it inside of the heart.

7. Using more adhesive, put a line of glue around the inside of the opening to the heart. Very carefully fold or pinch it together with the stick still inside the heart.

8. Prop it up and let it dry.

9. I waited for an entire day before I completed it. Using whatever yarn you decided on, cut off a piece about as long as your forearm. Using your glue, make a thin line about where the end of your stitching on the heart was, down to the stick.

10. Start wrapping the yarn around the end of your heart and onto the stick. Use up all your yarn, or if you cut too much simply cut away the excess and glue the end piece down. This gives the bottom of the heart a more finished look and covers up the glue spots from where you glued the stick in.

Now, think of the options you could use these for! Cake toppers, photo props, and even (what I’ll be using them for) accents to potted plants. Instead of buying your loved one that bouquet of flowers that’s surely going to die in at least 2 days, get them a potted plant or a flower and put one of these little handmade felt hearts in it. Perfect little touch! I even like the idea of having some extra yarn hanging off the bottom of the heart, taking a photo and tying it to the yarn. A memorable snapshot, or even a clue to a bigger Valentines Day surprise.

Endless possibilities!

Stay tuned for tomorrows DIY! It’s the last of this week.

xo

1 Comment

Filed under crafts, DIY

Sweet Treats for Fido

In my case, it would be sweet treats for Lucy and Sophie. I’ve made these treats a few times before, and the girls absolutely love them.

Ingredients

  • 2 1/2 cups  flour
  • 2 eggs
  • 1 cup canned pumpkin
  • 2 tablespoons peanut butter
  • 1/2 teaspoon salt

Directions:

  1. Preheat oven to 350
  2. Mix together the flour, eggs, pumpkin, peanut butter, salt, and in a bowl. Add water as needed to help make the dough workable, but I didn’t need to at all. I found the pumpkin kept it pretty moist.
  3. Roll the dough out on a surface such as a counter top. I found putting down a layer of flour helped it to not stick.  Take your heart shaped cookie cutter (or any cookie cutter shape you want) and go to town! Cut out as many pieces as you can make. I was able to make 13 cookies.
  4. Bake in preheated oven until they harden. About 30-40 minutes. Keep an eye on them! I was able to take them out just in time for them to still be a little soft, which the girls appreciated.

I promise, your little poochies won’t be able to get enough of these. The heart shapes will give it an extra touch, so they won’t feel left out on the upcoming day-o-love!

xo

1 Comment

Filed under food, recipes

Sweets for your Sweetheart: Vday inspired recipes

It’s Thursday! The day before Foodie Friday! So why am I bringing you a foodie post on a Thursday? Well.. I’m hungry!

Today I like the number 4, and keeping with that I’m bringing you 4 amazing Valentines Day inspired recipes I found online recently.

{heart shaped macaroons}


{heart shaped egg in nest} this one is by far my favorite idea.

{source} I love the heart shaped mini pancakes. Bite size!


{red velvet cheesecake milkshake}

Hopefully you feel inspired to make some sweets for your sweetie on this upcoming Valentines Day! Since it falls on a day during the week, I’ll probably be surprising Kh with something on the weekend before, or even after.

xo

8 Comments

Filed under food, recipes

DIY Framed Paint Sample Heart-work

One of my favorite projects to do would have to be the one that costs me next to nothing. And one way to achieve the virtually free craft is to have cheap- to – free supplies. The best place to get such a thing? Home Depot! Or essentially any store that sells paint and has paint samples for the taking. I almost always stock up whenever I’m in my local Home Depot. I’m sure they have me flagged for the crazy paint sample lady.

Today’s DIY is both inspired by my love of free paint samples, and Valentines Day.

Supplies:

  • At least 3 cards of paint samples with a gradient to them
  • Scissors
  • Glue
  • Thick paper (I used printmaking paper, you could use cardstock, watercolor paper, etc)
  • 5″x7″ frame

Directions:

Before I began, I made 3 hearts of varying sizes as stencils to trace from. It made it much easier than free handing them all.

1. Start tracing the largest of your hearts at whichever side of the gradient you want to be the first color. I traced only three large hearts in total. The colors I chose weren’t of high enough contrast to really see a difference, it’s very subtle in the gradient.

2. Continue on with the medium sized heart and the smallest heart. The medium heart I traced 12 of, and the smallest had 18. I made sure to trace a few extra so I could play around with the design if I wanted to.

3. Cut out all of the hearts you just traced.

4. Glue all the hearts to the 5″x7″ thick paper you have.

5. Let it dry. Once completely dry wipe off and clean up all the extra glue that may be on the paper.

6. Frame it, hang it, you’re done!


Incredibly easy, and since I already had the supplies it only cost me $3 for the frame at Target. They had them in red and pink, but I liked the white the best.

All of this week I’ll be having more Valentines inspired DIY’s, so stay tuned! Dog treats, felt hearts, and more!

Want more inspirational ways to use paint samples? If you missed it, check out my DIY Paint Sample Lampshade!

xo

6 Comments

Filed under crafts, DIY

DIY Sculpey Heart Bracelet

Today I bring you a simple little DIY with so many possibilities. A sculpey heart bracelet! I chose to use a teal colored sculpey, and although it’s not your traditional Valentines Day colors, I’m still rather fond of it. You of course could use any color sculpey you want. Even multiple colored hearts!

Supplies:

  • Sculpey
  • Knitting needle (or something sharp enough to poke through the sculpey)
  • Satin thread (beading cord, leather cord, hemp etc. Anything you want to use)
  • Tape
  • Pen (or something circular to make the dent at the top of the heart)

Directions:

1. Take your desired colored sculpey and rip off a workable chunk. Knead the sculpey to get it soft enough to work with.

2. From here I ripped off pieces, all of which were the size of the hearts I wanted to create.

3. Pinch the bottom of the sculpey into a point, and at the other end take your pen and press it in the middle of the top to create the top of the heart.

4. This part can be tricky! Take the sharp object you’ve chosen, and holding the heart sideways, poke a hole going all the way through to the other side. Be careful not to pinch it too much or it’ll misshape the heart.

5. Repeat! I ended up with around 16 hearts, 13 of which I ended up using on the bracelet. It’s better to have too many than to few.

Now once you have a satisfactory amount of hearts, fire your sculpey (or whichever clay you’re using) according to the specifications on the package.

Once your hearts have been fired and set aside to cool, I waited a couple of days, move on to these next steps.

1. Using whatever thread or cord you decide upon, cut off about 2 1/2 times more than what you’re making. I made a bracelet, so I wrapped the satin thread around my wrist, marked how long it was, and then doubled it and added a little extra. I wanted to make sure I had enough to make all the knots and then some.

2. Hold the two loose ends together, and at the other end tie a knot. Depending on what you chose as your thread you may need to make several knots. Leave a loop at the very end.

3. Tape down this piece of the thread securely to a table or the surface you are working on.

4. Taking one side of the thread, and one of your hearts, thread it through the heart. Keeping one side of the strong on the back portion of the heart.

5. Tie a knot. I had to tie two in order to keep the satin thread from moving and coming untied.

6. Repeat step 4. Keeping repeating it until you have as many hearts as you’ll need. As I mentioned, I used 13.

7. Now leave enough room on the string to be tied to the other end. Un-tape the other end and loop it through this end. Tie a couple of knots to keep it in place. I also put a bit of glue to hold the knot from coming undone. You can certainly close it any way you see fit. Next time I may use a clasp on the end to easily be able to remove the bracelet.

See, easy, and so many variations you could do to it. I even like the idea of making a keychain, or even a necklace.

Keep coming back this week for even more Valentines Day DIY’s!

xo

4 Comments

Filed under Uncategorized